Uncategorized

soil test

Understanding Different Types of Soil Tests Used in Construction

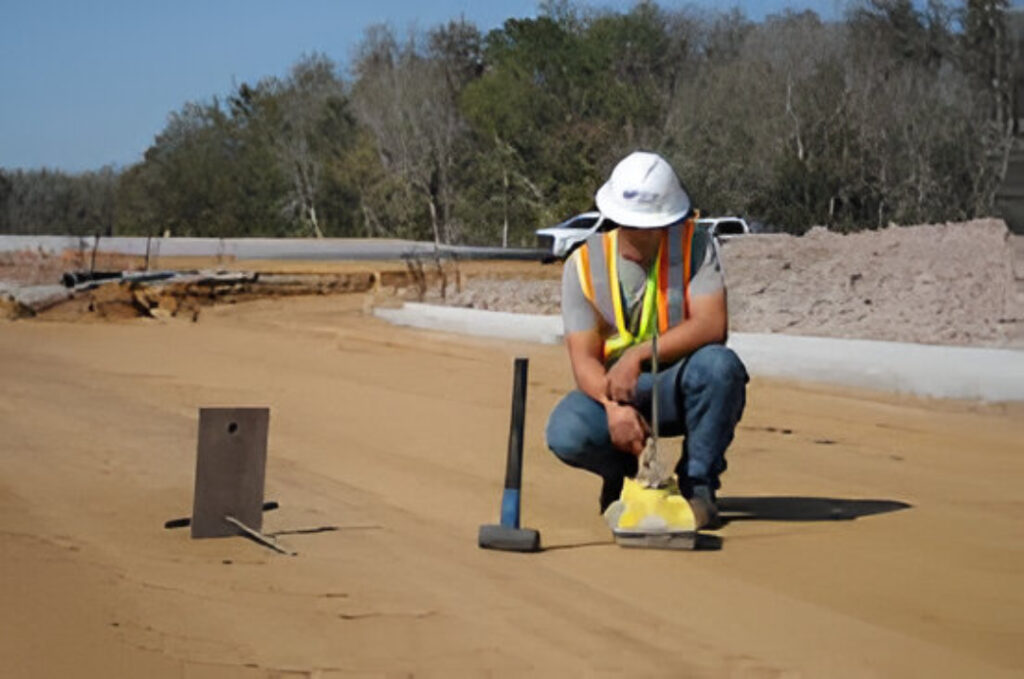
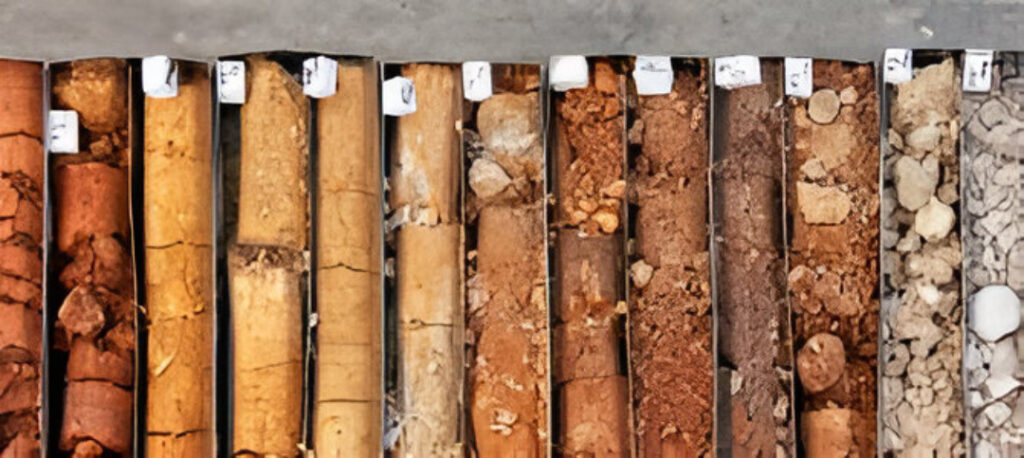
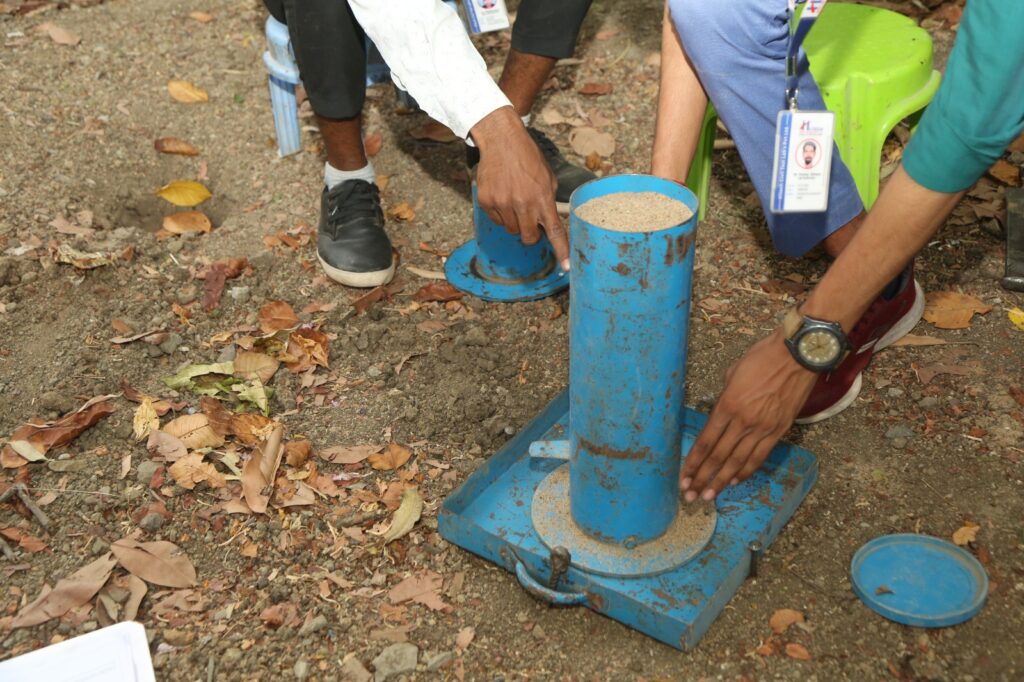
When embarking on a construction project, one of the most critical aspects to consider is the soil on which the structure will stand. Soil is the foundation of any building, and understanding its properties is essential to ensure safety, stability, and longevity. This is where soil testing comes into play. Various types of soil tests are conducted to gather essential information about the soil’s physical, chemical, and engineering properties. In this blog, we will explore the different types of soil tests used in construction and their significance.  Why Soil Testing is Important? Before delving into the specific tests, it’s vital to understand why soil testing is a crucial step in the construction process. Soil testing helps in: 1. Assessing Load-Bearing Capacity: Knowing how much weight the soil can support is essential for designing a safe structure.  2. Determining Soil Composition: Different soil types (sand, clay, silt) have different properties. Understanding these allows engineers to choose appropriate construction methods and materials. 3. Identifying Potential Issues: Soil tests can reveal problems such as contamination, high water tables, or extreme shrink/swell potential, which can affect the construction project. 4. Regulatory Compliance: Many regions require soil testing to comply with local regulations and building codes.  Types of Soil Tests There are two primary categories of soil testing: field tests and laboratory tests. Here’s a comprehensive look at the various types within these categories.  1. Field Tests Field tests are conducted directly on-site. They provide immediate results and help in assessing the practical behavior of the soil. A. Standard Penetration Test (SPT) The SPT is one of the most commonly used field tests. It involves driving a split-spoon sampler into the soil at the bottom of a borehole. The number of blows required to drive the sampler a certain distance gives insight into soil density and strength. Higher blow counts typically indicate denser and stronger soil. B. Cone Penetration Test (CPT) In the CPT, a cone-shaped probe is pushed into the ground to assess the soil’s resistance. This test provides continuous data about soil stratification and strength, making it a valuable tool for both geotechnical engineers and construction planners. C. Vane Shear Test This test is primarily used for soft clays. A vane is inserted into the soil, and torque is applied until the soil fails. This method helps determine the shear strength of the soil, crucial for evaluating slope stability and other relevant factors. D. Pocket Penetrometer Test This is a quick and straightforward field test used to estimate the unconfined compressive strength of cohesive soils. It involves pushing a small device into the soil to measure resistance, providing a rough estimate of soil strength without the need for extensive equipment.  2. Laboratory Tests Laboratory tests are conducted on soil samples collected from the testing site. They provide detailed and accurate information about the soil’s properties. A. Atterberg Limits Test This test determines the plasticity of fine-grained soils by measuring the moisture content at which they change state (liquid to plastic and plastic to solid). It helps classify soils and predict their behavior under different moisture conditions. B. Grain Size Analysis This test evaluates the distribution of different particle sizes in the soil sample. Common methods include sieve analysis for coarse-grained soils and hydrometer analysis for fine-grained soils. Understanding soil grain size is essential for determining permeability and compaction characteristics. C. Proctor Compaction Test The Proctor test determines the maximum density of soil given a specific amount of moisture. It involves compacting soil samples at various moisture levels to establish the optimum moisture content for maximum density, which is crucial for ensuring stability in construction. D. Direct Shear Test This laboratory test measures the shear strength of soil under controlled conditions. A soil sample is placed in a shear box and subjected to normal and shear forces, providing valuable data for slope stability and foundation design. E. Unconfined Compressive Strength Test (UCS)  The UCS test is used to determine the compressive strength of cohesive soil samples without any lateral pressure. The sample is subjected to axial loading until failure. This information is essential for designing foundations and assessing soil stability. F. Consolidation Test This test assesses how soil will settle over time under applied loads. It measures the rate of consolidation and the amount of settlement over time, which is crucial for structures that will experience significant loading. Soil testing is a fundamental part of the construction process that helps to ensure the safety and stability of any built structure. By understanding the different types of soil tests available—both field and laboratory—engineers and construction professionals can make informed decisions regarding site selection, design, and construction techniques.  Investing in proper soil testing can prevent costly mistakes and potential failures down the line, paving the way for successful construction projects. Whether you’re digging a small foundation or planning a large-scale development, understanding the soil beneath your feet is key to a solid future. So, don’t overlook this crucial step in your construction journey—your structure’s future depends on it!

Understanding Different Types of Soil Tests Used in Construction Read More »

Cement Tests

Types of Cement Tests and Their Relevance in Modern Construction

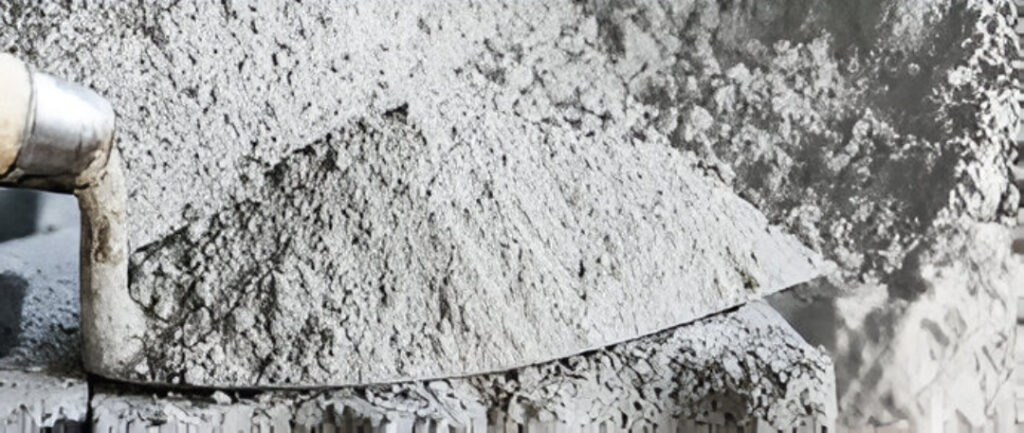
Cement is the backbone of modern construction, serving as the key binding material in concrete and mortar. To ensure the strength, durability, and safety of structures, it is essential to test cement before use. Various types of cement tests—such as fineness, consistency, setting time, compressive strength, and soundness—are conducted to assess its quality and suitability for specific applications. These tests help engineers and builders make informed decisions, prevent structural failures, and comply with industry standards. In today’s fast-evolving construction landscape, understanding cement testing is vital for achieving long-lasting and sustainable building outcomes. Cement is the core ingredient of modern construction. From simple brick walls to massive dams and high-rise buildings, cement plays a critical role in ensuring strength, durability, and performance. But not all cement is the same. Before it is used in any project, it must undergo thorough testing to ensure it meets the required standards. At HiTech Civil Test Lab, we conduct a variety of cement tests to verify quality, consistency, and suitability for construction. These tests help identify whether the cement being used will contribute to a safe, long-lasting structure. In this article, we will explore the key types of cement tests and why they are essential in today’s fast-paced construction environment. Why Cement Testing is Important? Cement is the binding material in concrete and mortar. If the cement is of poor quality or has deteriorated due to improper storage, it can compromise the entire structure. Regular cement testing ensures: Whether you are constructing a residential home or a large infrastructure project, accurate cement testing is a critical step in the quality assurance process. Common Cement Tests Conducted in Laboratories At HiTech Civil Test Lab, we perform the following standard tests to assess the quality of cement: 1. Fineness Test of Cement This test determines how fine the cement particles are. Finer cement offers better surface area for hydration, leading to faster setting and higher strength. The test is conducted using either a sieve analysis method or an air permeability method. Relevance: Affects rate of hydration, workability, and strength development in concrete. 2. Consistency Test This test measures the amount of water required to make a cement paste of standard consistency. A Vicat apparatus is used to determine this. Relevance: Helps in deciding the correct water-cement ratio for mixes, which directly impacts strength and setting time. 3. Setting Time Test (Initial and Final) Cement must neither set too quickly nor too slowly. This test determines the time it takes for cement paste to start setting (initial setting time) and the time to complete hardening (final setting time). Relevance: Ensures the cement allows enough time for mixing, transporting, placing, and finishing without setting prematurely. 4. Soundness Test Soundness refers to the ability of cement to retain its volume after setting. This test detects the presence of excess lime or magnesia, which can cause expansion and cracks. The Le Chatelier apparatus is commonly used for this test. Relevance: Prevents delayed expansion, cracking, or disintegration of hardened concrete. 5. Compressive Strength Test One of the most important tests, it checks the load-bearing capacity of cement mortar cubes after curing for 3, 7, and 28 days. This test confirms whether the cement meets the strength requirements of the project. Relevance: Assures the structural load capacity and helps in selecting suitable cement grades for different applications. 6. Heat of Hydration Test This test measures the amount of heat generated when cement reacts with water. High heat can cause thermal cracking, especially in mass concreting works like dams. Relevance: Important for large-scale concrete pours where temperature control is critical. 7. Specific Gravity Test This test helps determine the density of cement. Specific gravity values indicate whether the cement is fresh and properly manufactured. Relevance: Useful in mix design calculations and quality checks during cement storage. Modern Relevance of Cement Testing in Construction In today’s construction landscape, the pressure to deliver projects quickly without compromising quality is higher than ever. Here’s why cement testing is even more critical now: Why Choose HiTech Civil Test Lab for Cement Testing? HiTech Civil Test Lab is a trusted name in material testing across Indore and the surrounding regions. We offer: Whether you are a builder, contractor, architect, or real estate developer, our cement testing services help you deliver projects with confidence. Cement testing is not an optional quality check — it is a vital part of responsible and reliable construction. Each test plays a role in ensuring that the material you use will stand the test of time, weather, and load. At HiTech Civil Test Lab, we are committed to supporting modern construction with accurate, timely, and standard-compliant cement testing. Before your next project begins, let us help you verify the strength behind your structure — because quality construction begins with quality materials. Contact HiTech Civil Test Lab today for expert cement testing solutions tailored to your project needs.

Types of Cement Tests and Their Relevance in Modern Construction Read More »

soil bearing capacity test

Soil Bearing Capacity Explained – A Guide for Builders

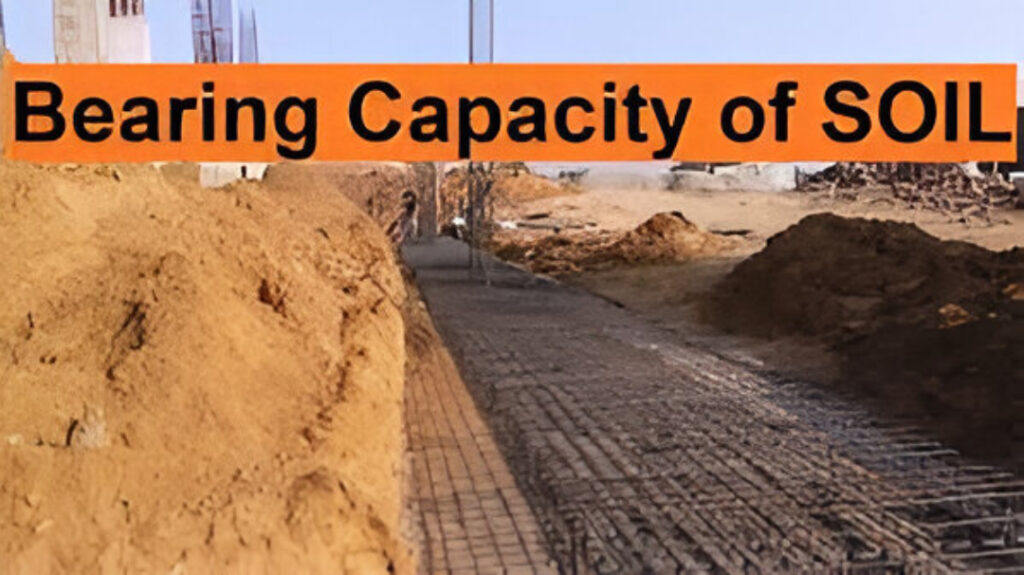
Every strong building begins with a reliable foundation, and the reliability of that foundation depends on what lies beneath — the soil. Before any construction begins, one critical factor must be determined: the soil bearing capacity. Understanding this concept is essential for builders, engineers, and architects alike, as it ensures the safety, durability, and cost-effectiveness of the entire structure. In this guide, we break down what soil bearing capacity means, why it matters, how it’s tested, and how it influences construction decisions. What is Soil Bearing Capacity? Soil bearing capacity refers to the maximum load per unit area that the ground can support without experiencing failure or excessive settlement. In simple terms, it indicates the maximum weight the soil beneath a building can safely support. If a structure exerts more pressure than the soil can support, it can lead to uneven settlement, cracks, or in extreme cases, structural collapse. Why Soil Bearing Capacity is Important in Construction 1. Safety of the Structure A building constructed on weak or untested soil is at risk. If the soil fails to support the weight of the structure, it could lead to cracks in walls, slanted floors, or even collapse over time. Knowing the soil’s bearing capacity helps prevent these hazards. 2. Foundation Design The type, size, and depth of the foundation depend directly on the soil’s strength. Strong soil may allow for shallow foundations, while weak soil may require deeper pile foundations or soil stabilization methods. 3. Cost Efficiency Understanding the soil’s capacity in advance helps avoid costly surprises later. It allows engineers to design the most efficient foundation, saving both time and money during construction. 4. Legal and Regulatory Compliance Many municipal authorities require a soil bearing capacity report before approving construction plans. Testing ensures that the project meets all local building codes and safety standards. Factors That Affect Soil Bearing Capacity Not all soils are created equal. Several factors influence how much load a soil can bear: Common Methods to Determine Soil Bearing Capacity At HiTech Civil Test Lab, we use standard testing procedures to evaluate the bearing capacity of soil with precision and accuracy. Here are a few common methods: 1. Plate Load Test This is a field test conducted by placing a steel plate on the soil surface and applying load incrementally. The settlement is measured at each stage to determine the safe bearing capacity. 2. Standard Penetration Test (SPT) A borehole is drilled, and a split-barrel sampler is driven into the soil using a hammer. The number of blows required to drive the sampler is recorded and used to estimate soil strength. 3. Core Cutter Method For cohesive soils, a cylindrical core cutter is used to extract a soil sample. Its density and moisture content are tested in the lab to calculate bearing capacity. 4. Dynamic Cone Penetration Test (DCPT) This test involves driving a cone into the ground using a standard weight. The resistance offered by the soil gives an idea of its load-bearing strength. Typical Soil Bearing Capacity Values (Indicative) Note: Actual values vary based on location, moisture content, and other local conditions. Always test before designing. How Builders Can Use This Information Trust HiTech Civil Test Lab for Accurate Soil Testing As a trusted name in material and geotechnical testing, HiTech Civil Test Lab provides comprehensive soil analysis services across residential, commercial, and infrastructure projects. Our expert team uses modern equipment, follows IS and ASTM standards, and delivers detailed reports that help builders make informed decisions. Whether you’re building a home, a warehouse, or a high-rise structure, we ensure your foundation starts on the right ground. Understanding and testing the soil bearing capacity is a non-negotiable step in the construction process. It forms the basis of a safe and successful project. Cutting corners at this stage can lead to long-term problems, safety risks, and financial losses. With professional testing services from HiTech Civil Test Lab, builders can move forward with confidence, knowing their foundation is based on accurate data and expert analysis. Build strong. Build smart. Build with confidence.

Soil Bearing Capacity Explained – A Guide for Builders Read More »

concrete testing

The Role of Concrete Testing in Quality Construction

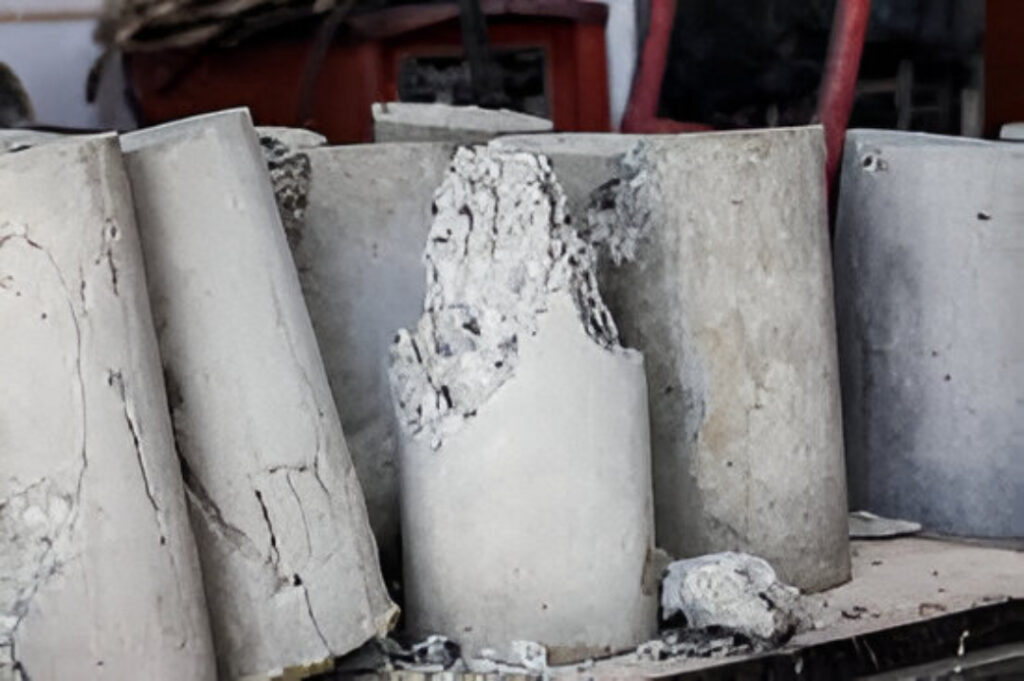
Concrete is the most widely used construction material in the world, forming the backbone of modern infrastructure. From skyscrapers to highways, residential buildings to industrial warehouses, concrete is everywhere. However, the strength, durability, and performance of concrete depend on its quality, which must be verified through systematic testing. At HiTech Civil Test Labs, we emphasize the critical role of concrete testing in ensuring quality construction that stands the test of time. Why Concrete Testing Is Essential? Concrete is a complex composite made from cement, water, fine and coarse aggregates, and sometimes admixtures. Each of these components can affect the final outcome. Even small variations in materials, mix proportions, or curing conditions can lead to structural deficiencies. Concrete testing eliminates uncertainty by providing data-driven assurance of the material’s strength, durability, and consistency. Some of the primary reasons concrete testing is essential in quality construction include: Key Concrete Tests in the Construction Process Concrete testing spans various stages—before placement (fresh concrete), during construction (on-site testing), and after curing (hardened concrete). Below are the most commonly used tests and their purposes. 1. Slump Test (Workability Test) The slump test is used to assess the consistency and workability of fresh concrete. It helps determine whether the concrete mix has sufficient flow to be placed and compacted without segregation. 2. Compressive Strength Test This is the most critical test, measuring the concrete’s ability to withstand load without failure. Concrete cubes or cylinders are cast and cured, then tested after 7, 14, or 28 days. 3. Flexural Strength Test Flexural strength, or modulus of rupture, measures the concrete’s ability to resist bending and is important for structures like pavements and slabs. 4. Air Content Test Air entrainment helps concrete resist freeze-thaw cycles. This test ensures the air content is within permissible limits 5. Rapid Chloride Permeability Test (RCPT) This test checks the permeability of concrete to chloride ions, which can cause corrosion in steel reinforcement over time. 6. Core Cutting and Testing In cases where in-situ concrete quality needs to be evaluated after casting, cores are drilled from the structure and tested for compressive strength. Factors Influencing Concrete Quality Concrete testing is not just about checking the final product—it also helps control variables that influence quality: By continuously testing and monitoring these variables, HiTech Civil Test Labs supports contractors and engineers in delivering projects that meet the highest standards of quality. Benefits of Concrete Testing for Stakeholders Concrete testing benefits every stakeholder in the construction process: Why Choose Hi-Tech Civil Test Labs for Concrete Testing? Hi-Tech Civil Test Labs is a trusted name in material testing, with specialized equipment, trained technicians, and NABL-compliant procedures. We offer: Our commitment is not just to test materials, but to empower our clients with insights that enhance construction quality and reduce long-term risk. In modern construction, quality assurance is no longer optional—it is a necessity. Concrete testing plays a pivotal role in ensuring that every building, bridge, or roadway is built on a solid foundation of verified strength and performance. With the help of professional material testing partners like HiTech Civil Test Labs, contractors and engineers can build smarter, safer, and more durable structures. Let quality be the cornerstone of your next project—start with trusted concrete testing.

The Role of Concrete Testing in Quality Construction Read More »

Material testing

Why Material Testing Is Crucial Before Any Construction Project?

Learn why material testing is crucial before commencing any construction project. Learn how it ensures safety, durability, and IS code compliance in building projects. Whether it’s a high-rise building, a highway, or a bridge, every construction project begins with one critical step—material testing. Before a single brick is laid or any concrete is poured, engineers and builders rely on civil testing labs to validate the quality of construction materials. This process is far from a formality; it is a scientific and safety-driven requirement that determines the integrity, lifespan, and cost-efficiency of any structure. What Is Material Testing in Construction? Material testing is the process of analyzing construction materials such as soil, cement, concrete, aggregates, steel, bitumen, and water to ensure they meet the required standards and are suitable for use in a particular project. This testing is usually conducted in specialized civil labs like Hi-Tech Civil Test Lab, which follow Indian Standards (IS codes) and international testing methods to provide accurate, reliable results. Why Is Material Testing Necessary Before Construction? 1. Ensures Structural Safety The primary purpose of any construction is to build something that stands the test of time. Material testing reveals the load-bearing capacity, compressive strength, and flexibility of materials. This ensures that structures do not fail under stress or environmental conditions. For example: A minor deviation in material quality can lead to major structural failures, which is why testing is non-negotiable. 2. Confirms Compliance with IS Codes and Project Specifications Every construction project in India must follow Bureau of Indian Standards (BIS) guidelines. Material testing confirms whether the selected materials meet these codes, thereby helping avoid legal issues and project delays. 3. Saves Long-Term Costs It might seem like an added expense initially, but testing materials before use helps you avoid costly repairs and rebuilds later. A faulty batch of concrete or substandard steel can compromise the entire structure, leading to increased maintenance or even collapse. 4. Helps in Selecting the Right Materials Not all construction sites are the same. For example, soil properties vary from place to place, and water used for concrete must be free of chemicals. By testing materials in advance, engineers can determine: This helps in customizing the material used as per site conditions. 5. Boosts Project Quality and Client Trust In an increasingly competitive construction industry, quality assurance is a key differentiator. Material testing ensures that your project meets the highest standards, which not only improves the project outcome but also builds trust with clients, investors, and stakeholders. 6. Prevents Construction Delays Testing in the pre-construction phase helps identify problems before they occur. This proactive approach allows developers to take corrective action in time, thereby avoiding delays due to sudden rejections of materials or mid-project changes. 7. Enables Quality Certifications Government tenders, large-scale infrastructure projects, and smart city contracts often require certified test reports for every material used. Having your materials tested in a NABL-accredited lab like Hi-Tech Civil Test Lab allows you to apply for and win such contracts confidently. Common Materials Tested Before Construction Here’s a look at the most common materials tested before construction and why each matters: Material Test Types Purpose Soil Proctor Test, CBR, Plate Load Test Determine bearing capacity Cement Fineness, Setting Time, Compressive Strength Quality & strength assurance Concrete Slump Test, Cube Test Workability & load capacity Aggregates Impact Value, Abrasion Test Check durability & toughness Steel Yield Strength, Elongation Test Assess flexibility & strength Water pH, Chloride, Sulphate Content Ensure compatibility with concrete Bitumen Penetration, Softening Point Evaluate road durability Why Choose Hi-Tech Civil Test Lab for Pre-Construction Testing? We help you start strong by ensuring the right materials are used from day one. Whether you’re building a residential society, a hospital, or an industrial facility, we provide the data you need to make informed decisions. Material testing is not just a technical formality—it’s the foundation of quality construction. It ensures the safety, durability, and long-term performance of your structure. Partnering with a reliable lab like Hi-Tech Civil Test Lab can prevent costly mistakes, reduce risk, and ensure that every project stands the test of time for decades to come.

Why Material Testing Is Crucial Before Any Construction Project? Read More »

Geotechnical Investigation

Geotechnical Investigation: What Every Architect Should Know? 

In the world of architecture and construction, great designs are not built on imagination alone—they are built on solid ground. And to truly understand the ground beneath, geotechnical investigations are essential. Yet, many architects, especially early in their careers, tend to overlook or underestimate this critical step. In this blog, we’ll cover what geotechnical investigations are, why they matter to architects, what the process involves, and how they can prevent structural and financial disasters in the future. What Is a Geotechnical Investigation? A geotechnical investigation is a detailed analysis of the physical and mechanical properties of soil and rock around a proposed construction site. The aim is to understand how the ground will behave when subjected to a building’s weight and environmental factors like rainfall, groundwater, or seismic activity. This investigation provides key data that informs the structural design, foundation type, excavation methods, and overall safety of a project. Why Should Architects Care? Architects often focus on the visual, spatial, and functional aspects of a building. But no matter how innovative a design is, it’s only as strong as the ground it’s built on. Here’s why geotechnical investigations matter to architects: 1. Foundation Design Coordination The type of soil influences the kind of foundation a building requires. A shallow foundation may work for firm soils, but soft or waterlogged soil may demand deep foundations or piles. Early collaboration with geotechnical engineers helps architects adjust designs accordingly and avoid costly redesigns later. 2. Site Feasibility and Budgeting Before committing to a design, architects need to know whether the proposed site can support it. Soil bearing capacity, groundwater level, and slope stability can significantly impact the cost and feasibility of a project. Knowing this early helps avoid unpleasant surprises during execution. 3. Risk Mitigation Ignoring or minimizing geotechnical insights can lead to: A small investment in soil testing can prevent major structural issues later. What Does a Geotechnical Investigation Include? 1. Desktop Study The process begins with studying maps, past records, geological reports, and satellite imagery to understand the basic geological context of the site. 2. Site Visit and Visual Inspection Experts observe the terrain, vegetation, drainage, and existing structures to assess potential issues such as landslides or erosion. 3. Soil Sampling and Boring This involves drilling boreholes at key points on the site to collect soil samples from various depths. These samples are taken to a laboratory for analysis. 4. Laboratory Testing Tests determine: These results help structural engineers design safe and efficient foundations. 5. Groundwater Study Understanding the groundwater level is crucial for basement design, waterproofing, and excavation planning. 6. Reporting and Recommendations The final geotechnical report includes test results, analysis, and detailed recommendations regarding: Key Geotechnical Terms Architects Should Know Common Mistakes Architects Make (and How to Avoid Them) Ignoring Early Soil Tests Fix: Involve a geotechnical engineer during the concept stage, not after. Assuming All Sites Are the Same Fix: Every site is unique—even neighboring plots can have different soil profiles. Designing Before Knowing Site Constraints Fix: Let the soil data guide design choices, especially for basements, podiums, or heavy-load structures. Not Communicating with Structural and Geotechnical Teams Fix: Regular interdisciplinary meetings ensure that the architecture, structural system, and soil conditions are in harmony. How Architects Can Collaborate Better with Geotechnical Engineers Outcome: Structure completed safely, and costly mid-project changes were avoided—thanks to a timely soil investigation. As an architect, your vision shapes skylines, but understanding the ground is what ensures those visions stand tall for decades. Geotechnical investigations are not just a technical requirement—they are a design necessity. When you begin a project, let the soil speak first. Collaborate with geotechnical experts, learn from the ground up, and design with confidence.

Geotechnical Investigation: What Every Architect Should Know?  Read More »

Non-Destructive Testing

How NDT (Non-Destructive Testing) Ensures Structural Safety? 

In various industries, particularly in construction, manufacturing, and aerospace, ensuring the safety and reliability of structures and materials is paramount. One key method for assessing the integrity of these materials is Non-Destructive Testing (NDT). Unlike traditional testing methods that may damage the material, NDT allows for the inspection of components without altering their future usability. This blog explores how NDT contributes to structural safety, the different methods employed, and its critical role in maintenance and quality assurance.  What is Non-Destructive Testing? Non-Destructive Testing, as the name suggests, refers to a range of techniques used to evaluate the properties of materials, components, or assemblies without causing any damage. The primary aim of NDT is to identify defects, discontinuities, or any inconsistencies that could compromise the safety and functionality of a structure. Industries use NDT to ensure that components meet safety standards and regulatory compliance without incurring the costs associated with destruction or replacement.  Importance of Structural Safety Structural safety is fundamental in safeguarding lives, maintaining public confidence in infrastructure, and ensuring operational integrity across various sectors. For instance, in aviation, the failure of a single part can lead to catastrophic consequences. Similarly, in construction, detecting flaws in beams or trusses can prevent catastrophic building failures. Thus, implementing effective testing methods is crucial to prevent accidents and ensure the longevity of structures.  Common NDT Methods NDT encompasses a variety of methods, each suited to different applications and types of materials. Here are some of the most widely used NDT methods: 1. Ultrasonic Testing (UT): This method employs high-frequency sound waves to detect internal flaws in materials. By sending sound waves through a material and analyzing the reflected signals, technicians can identify defects such as cracks, voids, or inclusions. UT is particularly effective in metals and is widely used in the aerospace and manufacturing industries. 2. Radiographic Testing (RT): Using X-rays or gamma rays, this method produces images of the internal structure of a component. RT is particularly useful for identifying internal defects and is commonly used in welding inspections, pipe inspections, and in assessing the integrity of structures like bridges and buildings. 3. Magnetic Particle Testing (MT): This technique is useful for detecting surface and near-surface defects in ferromagnetic materials. By applying a magnetic field and then using magnetic particles, technicians can reveal flaws that might not be visible with the naked eye, ensuring the integrity of components such as gears and shafts. 4. Liquid Penetrant Testing (PT): PT involves applying a liquid dye to the surface of a component to detect surface-breaking defects. After allowing the dye to penetrate for a specific period, excess dye is removed, and a developer is applied to draw out the trapped dye, revealing flaws. This method works well on non-porous surfaces and is commonly employed in the automotive and aerospace industries. 5. Eddy Current Testing (ECT): This electromagnetic technique is effective for detecting surface and near-surface flaws in conductive materials. Eddy currents are induced in the material being tested, and variations in these currents can indicate flaws or changes in material properties. ECT is particularly useful in inspecting aircraft components and tubing.  How NDT Contributes to Structural Safety? 1. Early Detection of Defects: NDT methods can detect issues before they become serious problems. For example, in the case of fatigue cracks in aircraft wings, early detection through techniques like ultrasonic testing can prevent disastrous outcomes and extend the life of the aircraft. 2. Cost-Effective Maintenance: Regular NDT inspections can help identify areas requiring maintenance or repair, allowing for targeted interventions rather than costly overhauls or replacements. This predictive maintenance approach prevents failures and minimizes downtime. 3. Regulatory Compliance: Many industries are governed by strict safety standards and regulations. NDT helps ensure compliance with these standards, protecting companies from legal liabilities and enhancing their reputation by demonstrating adherence to safety protocols. 4. Quality Assurance: NDT plays an essential role in quality control. By ensuring that materials and components meet stringent quality requirements, companies can enhance their products’ reliability and performance, ultimately protecting end-users. 5. Extended Lifespan of Structures: Regular NDT inspections can be instrumental in extending the lifespan of structures. By identifying and addressing potential issues early, companies can maintain their assets more effectively and delay or prevent premature failures.  The Future of NDT As industries evolve and technology advances, the future of NDT looks promising. Innovations such as automated inspection systems, artificial intelligence, and data analytics are enhancing the effectiveness and efficiency of NDT methods. For instance, drones equipped with NDT technologies can perform inspections in hard-to-reach areas, while machine learning algorithms can analyze data from inspections to identify patterns and predict failures. Additionally, the integration of NDT with the Internet of Things (IoT) enables real-time monitoring and condition assessment of structures, facilitating proactive maintenance approaches. This fusion of technologies is set to revolutionize how industries approach structural safety, ensuring that NDT remains an integral part of the maintenance strategy. Non-destructive testing is an indispensable tool in ensuring the safety and integrity of structures across various industries. By enabling the detection of defects without damaging components, NDT not only promotes safety but also enhances cost-effectiveness and regulatory compliance. As technology continues to advance, the role of NDT in maintaining the structural safety of buildings, bridges, pipelines, and other critical assets will only grow more significant. By investing in NDT, organizations are investing in a safer future, protecting both their assets and the people who rely on them.

How NDT (Non-Destructive Testing) Ensures Structural Safety?  Read More »

Different Types of Soil Tests Used in Construction

When embarking on a construction project, one of the most critical aspects to consider is the soil on which the structure will stand. Soil is the foundation of any building, and understanding its properties is essential to ensure safety, stability, and longevity. This is where soil testing comes into play. Various types of soil tests are conducted to gather essential information about the soil’s physical, chemical, and engineering properties. In this blog, we will explore the different types of soil tests used in construction and their significance.  Why Soil Testing is Important? Before delving into the specific tests, it’s vital to understand why soil testing is a crucial step in the construction process. Soil testing helps in:https://en.wikipedia.org/wiki/Soil_test 1. Assessing Load-Bearing Capacity: Knowing how much weight the soil can support is essential for designing a safe structure.  2. Determining Soil Composition: Different soil types (sand, clay, silt) have different properties. Understanding these allows engineers to choose appropriate construction methods and materials. 3. Identifying Potential Issues: Soil tests can reveal problems such as contamination, high water tables, or extreme shrink/swell potential, which can affect the construction project. 4. Regulatory Compliance: Many regions require soil testing to comply with local regulations and building codes.  Types of Soil Tests There are two primary categories of soil testing: field tests and laboratory tests. Here’s a comprehensive look at the various types within these categories.  1. Field Tests Field tests are conducted directly on-site. They provide immediate results and help in assessing the practical behavior of the soil. A. Standard Penetration Test (SPT) The SPT is one of the most commonly used field tests. It involves driving a split-spoon sampler into the soil at the bottom of a borehole. The number of blows required to drive the sampler a certain distance gives insight into soil density and strength. Higher blow counts typically indicate denser and stronger soil. B. Cone Penetration Test (CPT) In the CPT, a cone-shaped probe is pushed into the ground to assess the soil’s resistance. This test provides continuous data about soil stratification and strength, making it a valuable tool for both geotechnical engineers and construction planners. C. Vane Shear Test This test is primarily used for soft clays. A vane is inserted into the soil, and torque is applied until the soil fails. This method helps determine the shear strength of the soil, crucial for evaluating slope stability and other relevant factors. D. Pocket Penetrometer Test This is a quick and straightforward field test used to estimate the unconfined compressive strength of cohesive soils. It involves pushing a small device into the soil to measure resistance, providing a rough estimate of soil strength without the need for extensive equipment.  2. Laboratory Tests Laboratory tests are conducted on soil samples collected from the testing site. They provide detailed and accurate information about the soil’s properties. A. Atterberg Limits Test This test determines the plasticity of fine-grained soils by measuring the moisture content at which they change state (liquid to plastic and plastic to solid). It helps classify soils and predict their behavior under different moisture conditions. B. Grain Size Analysis This test evaluates the distribution of different particle sizes in the soil sample. Common methods include sieve analysis for coarse-grained soils and hydrometer analysis for fine-grained soils. Understanding soil grain size is essential for determining permeability and compaction characteristics. C. Proctor Compaction Test The Proctor test determines the maximum density of soil given a specific amount of moisture. It involves compacting soil samples at various moisture levels to establish the optimum moisture content for maximum density, which is crucial for ensuring stability in construction. D. Direct Shear Test This laboratory test measures the shear strength of soil under controlled conditions. A soil sample is placed in a shear box and subjected to normal and shear forces, providing valuable data for slope stability and foundation design. E. Unconfined Compressive Strength Test (UCS)  The UCS test is used to determine the compressive strength of cohesive soil samples without any lateral pressure. The sample is subjected to axial loading until failure. This information is essential for designing foundations and assessing soil stability. F. Consolidation Test This test assesses how soil will settle over time under applied loads. It measures the rate of consolidation and the amount of settlement over time, which is crucial for structures that will experience significant loading. Soil testing is a fundamental part of the construction process that helps to ensure the safety and stability of any built structure. By understanding the different types of soil tests available—both field and laboratory—engineers and construction professionals can make informed decisions regarding site selection, design, and construction techniques.  Investing in proper soil testing can prevent costly mistakes and potential failures down the line, paving the way for successful construction projects. Whether you’re digging a small foundation or planning a large-scale development, understanding the soil beneath your feet is key to a solid future. So, don’t overlook this crucial step in your construction journey—your structure’s future depends on it!

Different Types of Soil Tests Used in Construction Read More »

7 Common Construction Materials

7 Common Construction Materials and How to Test Their Quality

Construction projects rely on a variety of materials, each with its own properties and advantages. Ensuring the quality of these materials is critical for the safety and longevity of structures. Here, we’ll discuss seven common construction materials and how to assess their quality effectively.  1. Concrete Description: Concrete is a composite material made from cement, water, and aggregate (sand, gravel, or rock). It is renowned for its strength and durability, making it a staple in construction. Quality Testing:  – Slump Test: This assesses the workability of freshly mixed concrete. A cone-shaped mold is filled with concrete, and once it’s removed, the amount the concrete slumps is measured. Ideal slump values depend on the specific use, typically ranging from 50 to 100 mm for most work. – Compression Test: Curing concrete samples in standard conditions and testing them for compressive strength at 7, 14, and 28 days helps verify whether the concrete achieves the required strength. – Air Content Test: This measures the amount of air in concrete, which affects its durability and strength. Typically, air content should be between 4-8% for good performance in freeze-thaw conditions.  2. Steel Description: Steel, often used for reinforcement in concrete structures, offers high tensile strength and ductility. It is vital for constructing frameworks, beams, and reinforcements. Quality Testing: – Tensile Test: This determines the yield strength and tensile strength of steel. A sample is pulled until it breaks, and measurements are taken to assess these properties. – Ultrasonic Testing: An effective method for detecting internal flaws in steel. Sound waves are passed through the steel, and any discrepancies in the transmission indicate potential defects. – Magnetic Particle Testing: This identifies surface and near-surface defects. A magnetic field is applied to the steel, and iron particles are sprinkled over it; defects will attract the particles, highlighting issues.  3. Wood Description: Wood is a versatile and aesthetically pleasing material used in construction for framing, flooring, and finishing. Different types of wood have varying strengths and uses. Quality Testing: – Moisture Content Test: High moisture content in wood can lead to warping and weakening. A moisture meter can quickly measure this; generally, the ideal moisture content should be between 6% and 12%. – Structural Integrity Check: Inspecting wood for knots, splits, or signs of decay (e.g., fungal growth or insect damage) is essential for determining its quality. – Bending Test: This can assess the strength and flexibility of wood. A sample is subjected to a bending load until it breaks, and the amount it bends before breaking offers insight into its quality.  4. Bricks Description: Bricks are block-like ceramic materials used in construction for walls, pavements, and other structures. Their longevity and thermal properties make them a popular choice. Quality Testing: – Water Absorption Test: Submerging a brick in water for 24 hours determines its porosity; a high absorption rate indicates low quality. Quality bricks typically absorb less than 20% of their weight in water. – Compressive Strength Test: This measures how much load a brick can withstand. Samples are placed in a compression machine until they fail, and this is compared against established standards. – Soundness Test: Tapping two bricks together should produce a ringing sound. A dull sound might indicate poor quality or internal flaws in the bricks.  5. Glass Description: Used in windows, facades, and doors, glass adds aesthetic value and light to buildings. Different types include tempered, laminated, and insulating glass. Quality Testing: – Thickness Measurement: Ensuring the glass meets specified thickness standards helps in assessing its strength and insulation properties. Micrometers or calipers can be used for accuracy. – Visual Inspection: Checking for surface defects, bubbles, or distortions is key. Quality glass should have a clear, uniform surface. – Impact Resistance Test: Testing glass for its ability to withstand impacts without breaking, particularly in safety applications, is crucial. This can involve dropping a weight or using a pendulum impact tester.  6. Asphalt Description: Asphalt is primarily used for road construction and paving applications. Its durability and waterproof qualities make it a commonly employed material. Quality Testing: – Viscosity Test: This assesses the flow properties of asphalt to ensure it will perform well under temperature variations. Using a viscosity meter helps quantify this property. – Aggregate Gradation Test: Ensuring that the aggregate mixed with asphalt conforms to specified grading standards is vital for performance. This involves sieving the aggregate and measuring the particle size distribution. – Rutting Resistance Test: Simulating traffic load and temperature conditions helps determine how well an asphalt mix can resist deformation under stress.  7. Insulation Materials Description: Insulation materials (e.g., fiberglass, foam, cellulose) are essential for energy efficiency in buildings, reducing heat loss and gain. Quality Testing: – Thermal Resistance (R-value) Test: This measures insulation’s ability to resist heat flow. Higher R-values indicate better insulation. Laboratory tests determine the R-value for different materials. – Sound Absorption Testing: Some insulation materials also provide sound reduction. This test evaluates how well a material can absorb sound waves. – Moisture Resistance Testing: This assesses how well the insulation can withstand moisture, which is critical for performance in humid environments.  The integrity and performance of construction materials directly influence the durability, safety, and efficiency of structures. By employing various tests, construction professionals can ensure that the materials used meet the required standards, minimizing risks and enhancing the longevity of their projects.  Regular quality assessments are crucial, not only to comply with regulations but also to maintain the trust of clients and stakeholders in the construction industry. Properly tested and vetted materials can lead to successful projects that stand the test of time.

7 Common Construction Materials and How to Test Their Quality Read More »

Scroll to Top